Homemade Chocolate Strawberries: Impressive & Easy for Any Event
Imagine a treat that looks incredibly sophisticated, tastes divine, and yet is surprisingly simple to create in your own kitchen. That's the magic of
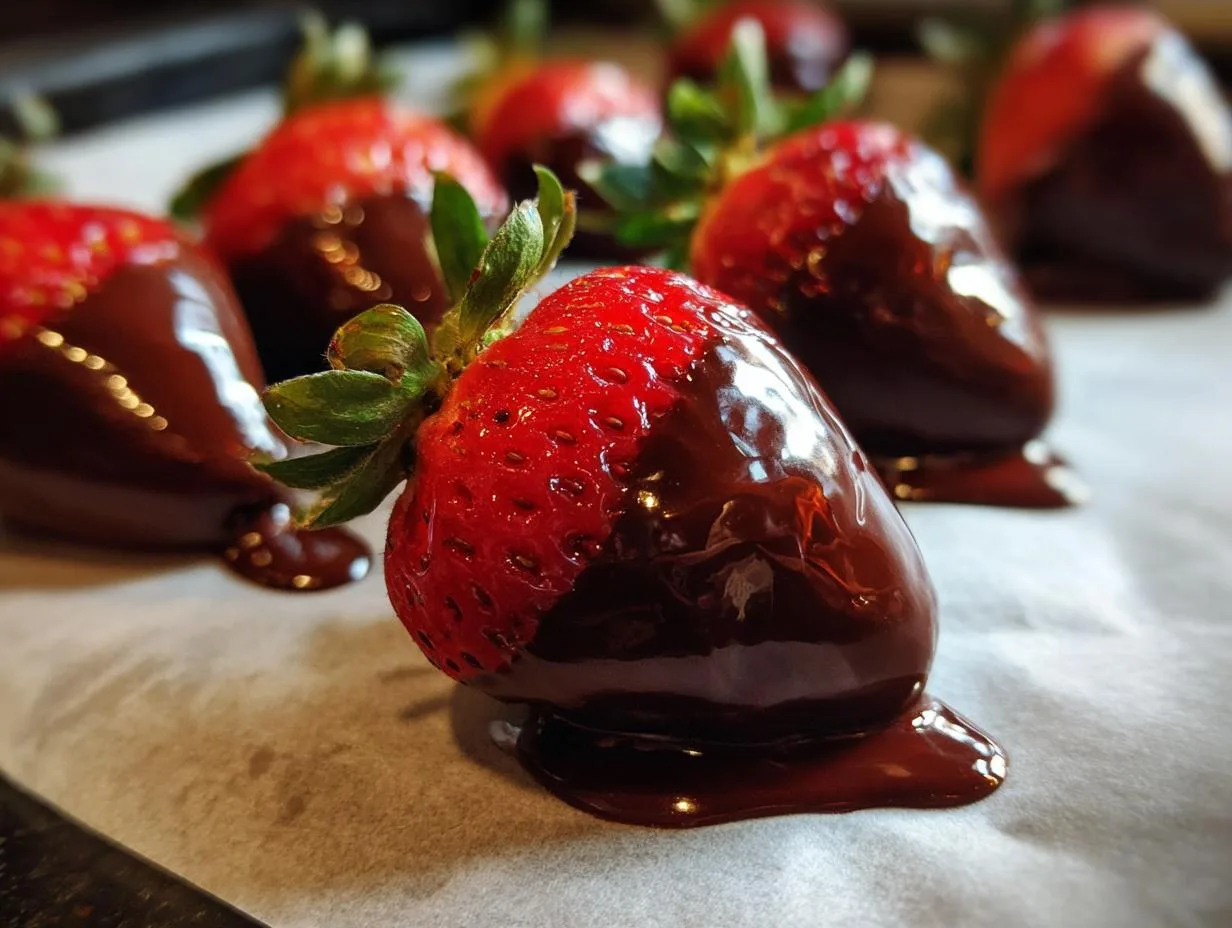
chocolate covered strawberries. Whether you're planning a romantic gesture for Valentine's Day, preparing for a festive gathering, adding a touch of elegance to a wedding, or simply indulging your sweet tooth, these luscious berries are always a showstopper. Forget the expensive gourmet boxes; with a few basic ingredients and simple techniques, you can craft your own impressive batch that will delight everyone.
Why Homemade Chocolate Covered Strawberries Are a Game Changer
There’s a unique satisfaction that comes from making gourmet treats at home, and chocolate-dipped strawberries are no exception. Beyond the significant cost savings compared to store-bought versions, homemade offers unparalleled freshness and the ability to customize. You control the quality of the chocolate, the ripeness of the strawberries, and the array of decorative drizzles or toppings. This simple, three-ingredient dessert allows you to enjoy a delectable sweetness while potentially even getting some antioxidants from dark chocolate. As many culinary enthusiasts attest, sometimes "the simplest treats are the tastiest," and this holds true for these surprisingly easy yet elegant confections.
Essential Ingredients and Tools for Your Dipping Adventure
Before you begin, gather your supplies. The beauty of this recipe lies in its minimal requirements, but choosing quality ingredients makes all the difference.
*
Fresh Strawberries: Aim for ripe, firm strawberries with vibrant green caps. About one pound (approximately 20 berries) is a good starting point.
*
Quality Chocolate: This is the star! Semisweet chocolate is a popular choice, but feel free to experiment with milk chocolate, dark chocolate, or even white chocolate for drizzling. Choose baking bars or good quality chips for the best melting consistency.
*
Shortening or Coconut Oil: This crucial ingredient is often overlooked but provides that professional, glossy finish and helps the chocolate harden beautifully. We’ll delve deeper into its importance shortly.
*
Basic Equipment:
* Glass bowls (microwave-safe) or a double boiler setup.
* Spatula or spoon for stirring.
* Baking sheet lined with parchment paper or a silicone mat.
* Toothpicks, wooden skewers, or the strawberry stems themselves for dipping.
Mastering the Art of Dipping: Step-by-Step Perfection
Making perfect chocolate-covered strawberries is a process that relies on a few key techniques. Follow these steps for an impressive result every time.
1.
Strawberry Preparation: First, gently wash your strawberries under cool running water. This is crucial for cleanliness. Next, and perhaps most importantly, dry them *thoroughly*. Any residual water will cause the chocolate to seize or create a lumpy, unappealing finish. Pat them dry with paper towels. For optimal dipping and setting, ensure your strawberries are at room temperature. Dipping cold berries straight from the fridge can lead to "sweating" as they warm up, creating a messy situation.
2.
Melting the Chocolate: There are two primary methods for melting your chocolate to a smooth, dippable consistency:
*
Microwave Method: Coarsely chop your chosen chocolate. Place it in a glass bowl and microwave in 30-second intervals. Stir well after each interval. The key here is to heat it *until it's not quite fully melted*, then stir to melt the remaining pieces. This gentle, incremental heating helps temper the chocolate to the perfect temperature, preventing scorching and ensuring a silky texture.
*
Double Boiler Method: If you prefer a stovetop approach, set a heat-safe glass or metal bowl over a pot filled with about a quarter way with simmering water (ensure the bowl doesn't touch the water). Place the chopped chocolate in the bowl, and the gentle steam will gradually melt it. Stir frequently until smooth.
3.
The Glossy Secret: Adding Shortening: Once your chocolate is melted and smooth, stir in a small amount of shortening or coconut oil. A good rule of thumb is about 1 teaspoon per 4 ounces of chocolate. This ingredient is what gives your
chocolate covered strawberries their characteristic smooth, glossy sheen and helps the chocolate set firm and crisp without needing refrigeration. For an in-depth understanding of this technique, check out our guide on
Unlock Glossy Chocolate-Covered Strawberries: The Shortening Secret.
4.
Dipping Your Berries: Hold each strawberry by its stem or insert a toothpick into the top. Dip it into the melted chocolate, rotating to coat evenly. Allow any excess chocolate to drip off by gently twirling the berry. For a neat finish, scrape the bottom of the berry against the rim of the bowl.
5.
Setting and Decorating: Place the dipped strawberries onto your prepared baking sheet. For an extra touch of flair, while the chocolate is still wet, you can drizzle them with melted white chocolate (using a fork or a piping bag with a tiny snip), or sprinkle with chopped nuts, shredded coconut, or edible glitter. There's no need to rush them into the fridge; the chocolate will naturally harden at room temperature over time.
Pro Tips for Flawless Chocolate-Covered Strawberries
Even with a straightforward recipe, a few insider tips can elevate your results from good to absolutely perfect.
*
Room Temperature is Non-Negotiable: We've said it before, but it bears repeating: cold strawberries will cause your chocolate to seize and create a poor finish. Plan ahead and let your berries come to room temperature.
*
Don't Skimp on Drying: Water is chocolate's enemy. Be meticulous with drying your strawberries to prevent any issues with the chocolate's texture.
*
Patience in Melting: Rushing the melting process can burn the chocolate, making it grainy and unusable. Low and slow is the way to go.
*
Shortening for Shine and Snap: As highlighted, shortening (or coconut oil) is key for a beautiful, firm shell. Don't skip it! For more detailed instructions and troubleshooting, refer to our article:
Perfect Chocolate-Covered Strawberries: Easy Recipe & Pro Tips.
*
Work in Batches: If you're making a large quantity, melt chocolate in smaller batches to ensure it stays at the ideal dipping consistency.
Storage and Presentation: Keeping Them Fresh and Fabulous
Once your beautiful chocolate-covered strawberries have set, proper storage will ensure they stay delicious for as long as possible.
*
Short-Term Storage: Store them in an airtight container at room temperature for up to one day. If you need them to last longer, refrigerate them for two to three days. Be aware that condensation can form in the fridge, so line your container with a paper towel to absorb moisture.
*
Freezing: Yes, you can freeze chocolate-covered strawberries for up to three months! However, be prepared that the strawberries might be a little mushy after thawing. They're still delicious, but the texture won't be as firm.
*
Gifting with Style: A box of homemade chocolate-covered strawberries makes an exceptional gift. Line a fancy box with paper doilies, arrange the berries neatly, tie it with a beautiful ribbon, and prepare for endless compliments! For an even more spectacular presentation, consider incorporating them into an edible fruit bouquet.
*
Serving Suggestions: Serve them as-is on a platter, skewer them for easier handling at parties, or arrange them around a larger charcuterie board to add a vibrant, sweet element to your spread. They are perfect for dessert parties, romantic occasions, or simply as an everyday indulgence.
Conclusion
Creating your own
chocolate covered strawberries is a rewarding culinary experience that yields truly impressive results with minimal effort. From the satisfying snap of the chocolate shell to the burst of fresh strawberry, these treats are a symphony of flavors and textures. By following these simple steps and incorporating a few professional tips, you can confidently craft elegant, delicious, and memorable chocolate-dipped delights for any occasion. So, go ahead, grab your ingredients, and transform humble strawberries into gourmet masterpieces that will impress everyone who takes a bite.