Unlock Glossy Chocolate-Covered Strawberries: The Shortening Secret Revealed
There are few treats as universally beloved and visually stunning as chocolate-covered strawberries. Whether gracing a romantic dinner, stealing the show at a party, or presented as a thoughtful gift, their allure is undeniable. While often perceived as a gourmet indulgence best left to professionals, crafting these delectable delights at home is surprisingly simple, affordable, and incredibly rewarding. The secret to achieving that coveted smooth, glossy finish that rivals any high-end confectioner? A seemingly humble ingredient: shortening.
Forget dull, crumbly, or overly thick chocolate coatings. With the right techniques and the strategic addition of a little shortening, you can transform ordinary strawberries into dazzling, picture-perfect masterpieces. This comprehensive guide will walk you through every step, from selecting the perfect berries to mastering the melt, ensuring your homemade chocolate-covered strawberries are nothing short of spectacular.
The Secret to Professional Gloss: Why Shortening is Your Best Friend
Many home cooks attempt chocolate-covered strawberries by simply melting chocolate and dipping. While this works, the results can often be disappointing: a chocolate coating that's too thick, prone to cracking, or lacking that characteristic brilliant sheen. This is where shortening steps in as your culinary secret weapon.
So, what exactly does shortening do? It plays several crucial roles:
- Enhances Smoothness and Thinness: Shortening acts as a fat that thins out the melted chocolate, creating a more fluid consistency. This allows for a thinner, more elegant coating on your strawberries, rather than a bulky layer that can overwhelm the delicate fruit. A thinner coat also means less chocolate is needed, making your efforts more economical.
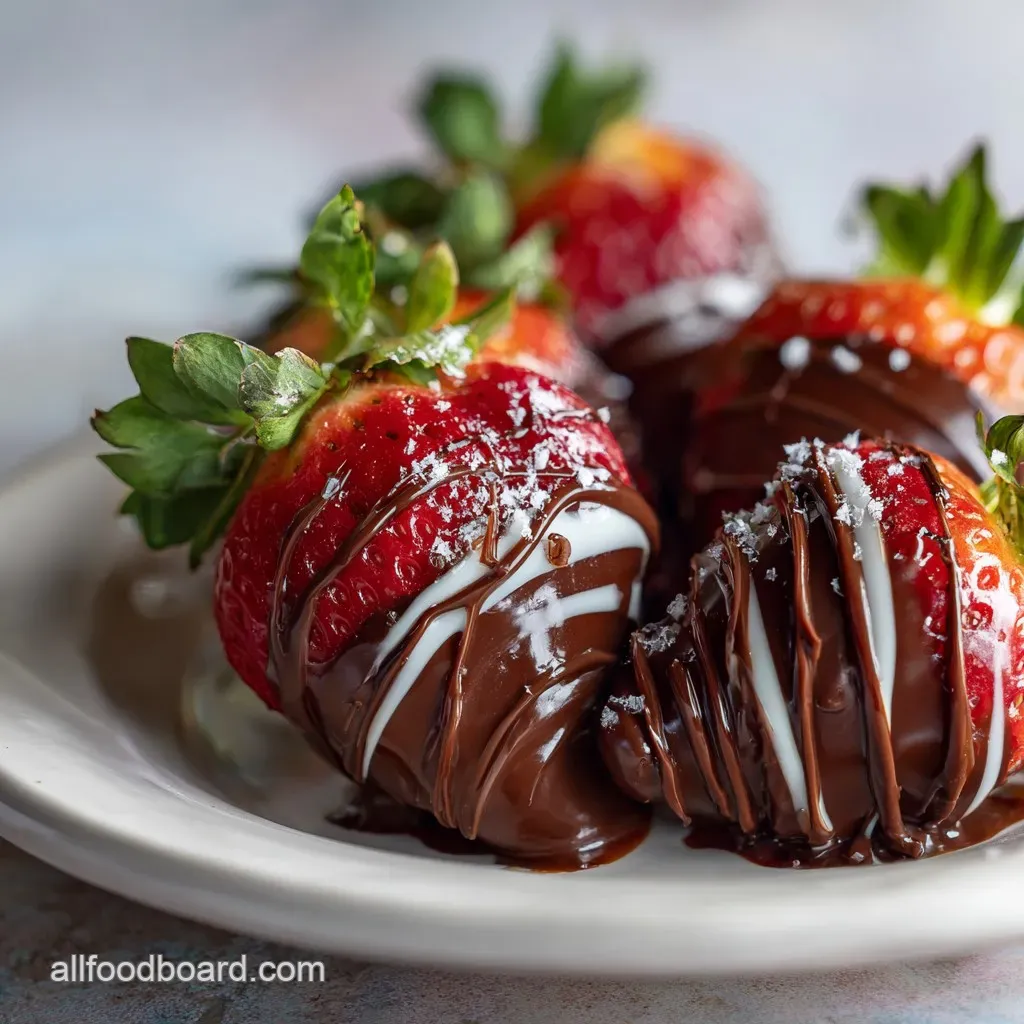
- Boosts Gloss and Shine: This is the magic touch! The fat in the shortening helps to emulsify the chocolate, promoting a smoother surface texture when it hardens. The result is a stunningly glossy finish that catches the light beautifully, giving your strawberries a truly professional, store-bought appearance.
- Aids in Hardening and Stability: According to culinary experts like Nicole McLaughlin, shortening is key to helping the chocolate harden properly. It contributes to a more stable crystalline structure in the chocolate as it sets, preventing stickiness and ensuring a crisp, satisfying snap when you bite into it. This also makes the chocolate less prone to melting quickly at room temperature.
- Prevents Seizing: While not its primary purpose, adding a small amount of fat like shortening can also offer a minor buffer against chocolate seizing (becoming thick and grainy) if a tiny bit of water or steam accidentally gets into your melting chocolate. However, preventing moisture contact remains paramount.
A little shortening goes a long way. Typically, just a teaspoon or two per cup of chocolate is sufficient to achieve these incredible results. When choosing shortening, a standard vegetable shortening is perfectly suitable and readily available.
Essential Ingredients and Tools for Success
Before you dive into dipping, gathering the right ingredients and tools is paramount. Quality matters, as does proper preparation, especially when it comes to your star fruit.
The Ingredients:
- Fresh Strawberries: Opt for firm, ripe strawberries with vibrant green caps. Avoid any that are bruised, overly soft, or moldy. Aim for medium to large berries, as they are easier to handle and offer a more satisfying bite.
- Quality Chocolate: The type of chocolate you choose will significantly impact the flavor.
- Semi-Sweet or Dark Chocolate: A classic choice, offering a balanced sweetness that beautifully complements the natural tartness of the strawberries. Dark chocolate also provides a healthy dose of antioxidants!
- Milk Chocolate: For those who prefer a sweeter, creamier profile.
- White Chocolate: Perfect for decorative drizzles or for a contrasting, sweeter coating. Be aware that white chocolate can be a bit more finicky to melt.
- Vegetable Shortening: As discussed, this is the key to gloss and smoothness. Ensure it's fresh and flavorless.
The Tools:
- Microwave-Safe Glass Bowl or Double Boiler Setup: For melting your chocolate. A glass bowl is ideal for microwave melting, while a metal or heat-safe glass bowl over a pot of simmering water is perfect for the double boiler method.
- Silicone Spatula: Gentle on chocolate, perfect for stirring and scraping down the sides of the bowl to ensure even melting.
- Parchment Paper or Silicone Mat: To line a baking sheet where your dipped strawberries will set. This prevents sticking and makes cleanup a breeze.
- Toothpicks, Skewers, or Just the Strawberry Stem: For easy dipping. Holding the green stem is often the easiest and most natural way, but toothpicks can offer more control for intricate dips.
- Small Saucepan (for double boiler method): If opting out of the microwave.
- Clean Kitchen Towels or Paper Towels: Absolutely critical for thoroughly drying your strawberries.
Step-by-Step Guide to Irresistible Chocolate-Covered Strawberries
Making these gourmet treats is a straightforward process, broken down into a few easy steps. The key is careful preparation and attention to detail.
- Prepare Your Strawberries:
- Wash Thoroughly: Gently rinse your strawberries under cool running water.
- Dry Meticulously: This is perhaps the most critical step! Any moisture on the strawberries will cause your chocolate to seize and become grainy. Lay them out on a clean kitchen towel or paper towels and gently pat them completely dry. Let them air dry for a few minutes if needed.
- Bring to Room Temperature: Ensure your strawberries are at room temperature before dipping. If you dip them straight from the fridge, they will "sweat" as they warm up, leading to condensation that can ruin your chocolate coating and make it slide off. Plan ahead and take them out about 30 minutes to an hour before you start.
- Prepare Your Workspace:
- Line a baking sheet with parchment paper or a silicone mat.
- Have your shortening measured out and ready.
- Melt the Chocolate (The Right Way):
- Microwave Method: Place your chopped chocolate (or chips) in a microwave-safe glass bowl. Microwave in 30-second intervals, stirring thoroughly with a silicone spatula after each interval. Heat until the chocolate is *mostly* melted, with a few small lumps remaining. Continue stirring, and the residual heat will melt the rest, ensuring a smooth, lump-free consistency and preventing overheating. This also helps to gently temper your chocolate for the best results.
- Double Boiler Method: Fill a saucepan with about an inch or two of water and bring it to a gentle simmer (not a rolling boil). Place a heat-safe glass or metal bowl over the saucepan, ensuring the bottom of the bowl does not touch the water. Add your chocolate to the bowl. Stir constantly as the gentle steam melts the chocolate. This method offers more control and less risk of burning, but requires careful attention to avoid any steam or water splashing into the chocolate.
- Incorporate Shortening: Once your chocolate is about 75% melted, add your shortening (typically 1-2 teaspoons per cup of chocolate). Continue stirring until both the chocolate and shortening are completely melted and beautifully smooth, glossy, and uniform.
- Dip the Strawberries:
- Hold a strawberry by its green stem or insert a toothpick into the top.
- Dip the strawberry into the melted chocolate, swirling gently to coat about three-quarters of the berry. Leave a small rim of red visible for a classic look.
- Lift the strawberry, allowing excess chocolate to drip back into the bowl. You can gently tap the stem against the rim of the bowl to encourage dripping and remove any large drips, creating a clean finish.
- For more detailed tips on achieving that perfect coating, check out our article on Perfect Chocolate-Covered Strawberries: Easy Recipe & Pro Tips.
- Set the Chocolate:
- Place each dipped strawberry gently onto the prepared parchment-lined baking sheet.
- There's no need to rush them into the refrigerator to set. The chocolate, thanks to the shortening, will naturally harden over time at room temperature, usually within 15-30 minutes, resulting in a beautiful, crisp coating.
Elevating Your Creation: Drizzles, Toppings, and Presentation
While plain chocolate-covered strawberries are delightful, a few extra touches can transform them into truly show-stopping desserts.
- White Chocolate Drizzles: For an elegant touch, melt a small amount of white chocolate (with a tiny bit of shortening) in a separate bowl. Using a fork or a piping bag with a very fine tip, drizzle patterns over your set milk or dark chocolate-covered strawberries. This creates a beautiful contrast and instantly elevates their appearance.
- Beyond the Drizzle: Get creative with toppings! Before the chocolate fully sets, roll or sprinkle your dipped strawberries with:
- Finely chopped nuts (pistachios, almonds, walnuts)
- Colorful sprinkles
- Toasted coconut flakes
- Crushed cookies or candy
- Mastering Presentation: Presentation is key, especially when gifting or serving for special occasions.
- Gifting: For a truly memorable present, line a fancy box with decorative paper doilies, arrange your glossy strawberries, and tie the box with a beautiful ribbon. A box of homemade chocolate-covered strawberries makes an incredibly thoughtful and impressive gift for any occasion, from birthdays to anniversaries.
- Serving: Arrange them artfully on a platter, perhaps alongside other fresh fruits or cheeses for a sophisticated dessert board. For larger gatherings, they can be skewered for easier handling or even incorporated into a stunning edible fruit bouquet, adding a touch of elegance and sweetness to your snack array. Our guide to Homemade Chocolate Strawberries: Impressive & Easy for Any Event offers more inspiring presentation ideas.
Storage and Longevity Tips
To keep your chocolate-covered strawberries fresh and delicious, proper storage is essential.
- At Room Temperature: If consumed within the same day, they can be stored in an airtight container at room temperature. The chocolate will remain perfectly set, and the strawberries will retain their firm texture.
- In the Refrigerator: For longer storage, place them in an airtight container in the refrigerator for up to two to three days. Be aware that refrigeration can sometimes cause a slight condensation to form on the chocolate as they warm up, potentially affecting the glossy finish. To minimize this, bring them out about 15-20 minutes before serving.
- Freezing: You can freeze chocolate-covered strawberries for up to three months. Arrange them in a single layer on a parchment-lined baking sheet until solid, then transfer them to an airtight freezer-safe bag or container. However, be aware that while the chocolate will hold up, the strawberries might become a little mushy after thawing. They are still delicious, but the texture will be softer.
Conclusion
Homemade chocolate-covered strawberries are more than just a dessert; they're an expression of care, creativity, and culinary know-how. By embracing the "shortening secret," you unlock the ability to create consistently smooth, perfectly set, and brilliantly glossy confections that will impress anyone who tastes them. This simple, affordable, and incredibly rewarding process allows you to enjoy gourmet quality treats right from your own kitchen. So go ahead, gather your ingredients, follow these steps, and prepare to delight your taste buds and dazzle your guests with these irresistible, picture-perfect chocolate-covered masterpieces.
